![]()
The Born2beRoot project is a system administration exercise that introduces virtualization concepts. You will create a virtual machine using VirtualBox or UTM, set up a server with Debian or Rocky Linux, and follow strict configurations, including strong password policies, sudo rules, and a monitoring script. The mandatory tasks include configuring encrypted partitions, a secured SSH service, and a firewall.
The bonus involves setting up additional features, like advanced partitioning, a WordPress website with specific services, or another functional service of your choice. However, bonus evaluation requires the mandatory part to be flawless.
Download the Debian ISO
Visit the Debian download page and download the latest stable version of a 64-bit small installation image (e.g., debian-12.8.0-amd64-netinst.iso).
Info
The minimal installation image is recommended for this project, since we don’t need a full Desktop Environment.
Create a New VM
- Open VirtualBox and click New.
- Name the virtual machine (e.g.,
Born2beRootVM). - Leave the Folder as the default location.
- Choose the ISO Image you downloaded.
- Make sure to check
Skip Unattended Installationin order to set up the VM manually.
Installation
Booting up
Now that our virtual machine is ready, the next step is to install the operating system, much like you would on a regular conputer.
Click “Start” on your Virtualbox interface. Select “Install” and then follow the on-screen instructions. The installation process is quite straightforward, especially when compared to more complex distributions like Arch or Gentoo. If you’ve ever tried installing those, you’ll find Debian notably easier.
Screenshots
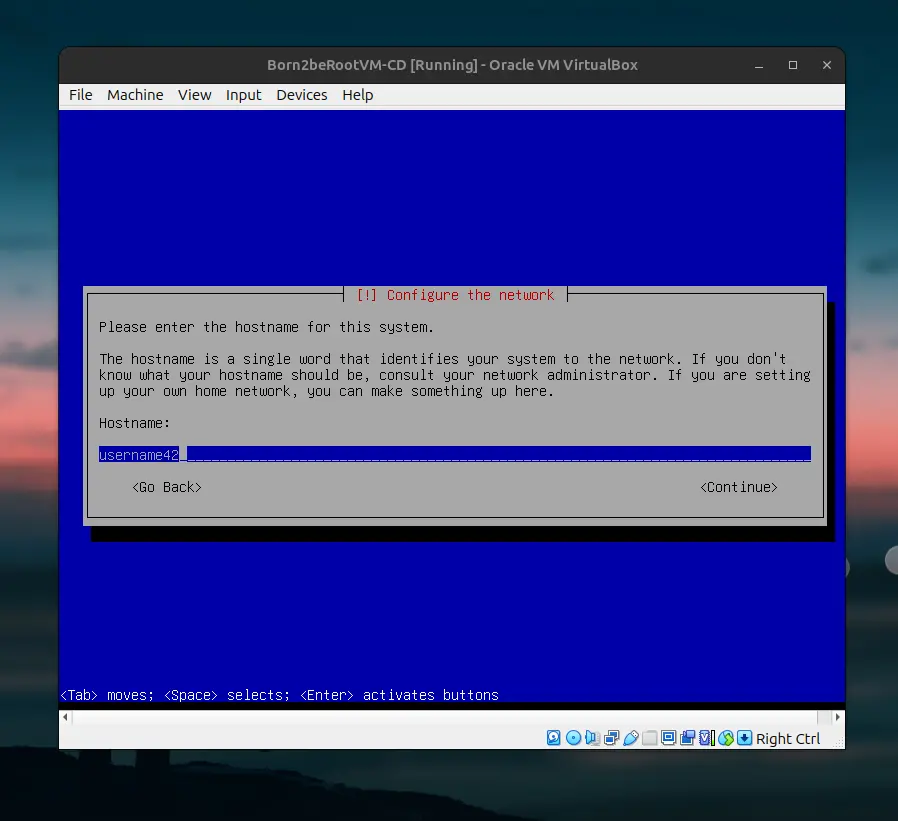
Set the hostname as your login followed by 42, as required by the project guidelines. This is the name of your device on the local network. Skip domain name configuration. Set a password for root. Make a user with your login and set a password for this account.
Partitioning
It’s time to partition our disk.
Mandatory part requires default partitioning:
/(root) In this case,/var,/tmp,srvand/homeare all part of the root partition./home(user data)/swap(swap space for RAM)
Bonus part requires separated partitions:
/(root)/home(user data)/swap(swap space for RAM)/var(variable data)/var/log(log files)/srv(data served by the system)/tmp(temporary files)
Info
Separating these partitions is usually a good idea for security reasons.
/var: This directory contains log files, databases, and other variable data. By separating it, you can apply different mount options or encryption. For example, you could limit the size of the /var partition to avoid logs or caches from filling up the entire disk, potentially breaking the system.
/tmp: This directory holds temporary files that applications and the system create. It’s a common place for exploits (like symlink attacks or temp file attacks). Putting it in its own partition allows you to mount it with secure options like noexec or nosuid to mitigate risks from malicious code in temporary files.
Also, by isolating different parts of the filesystem (especially
/tmp, which can be used heavily during operations), you can optimize disk I/O performance for each partition. For example, if/tmpfills up due to a large process creating temp files, it won’t affect/homeor/var.
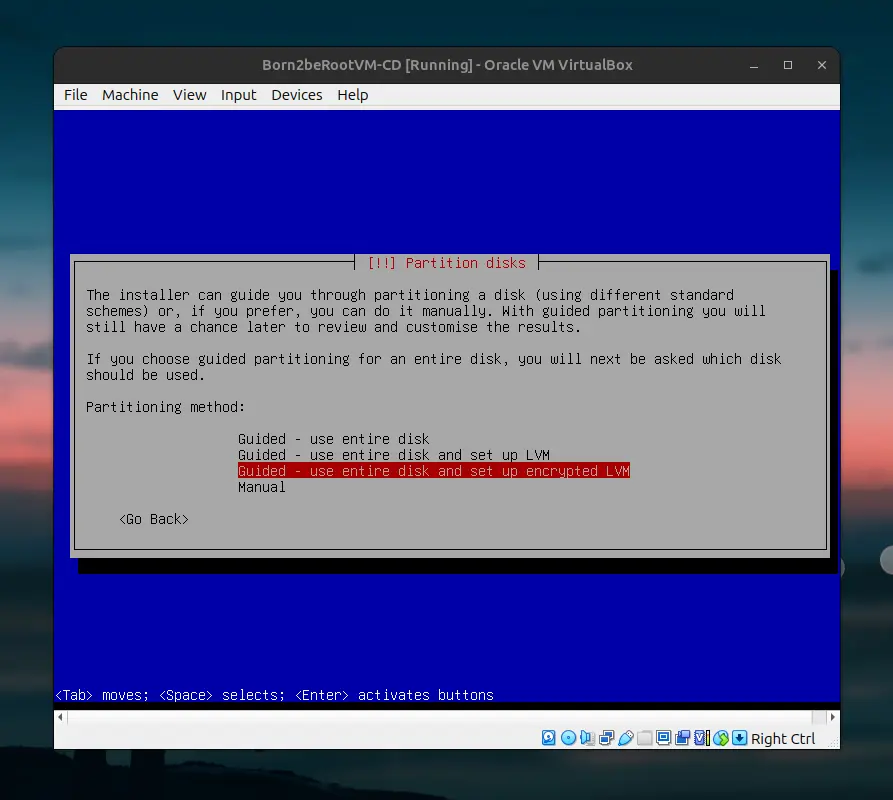
We will go straight to the bonus part and set up the separated partitions.
Select “Guided - use entire disk and set up encrypted LVM” then select “Separate /home, /var and /tmp partitions”. This setup is crucial for completing the bonus part of born2beroot.
Set a password. With this, even if the police raid my home, they won’t get to my data unless they break my (super weak) password. 🥸
Screenshots

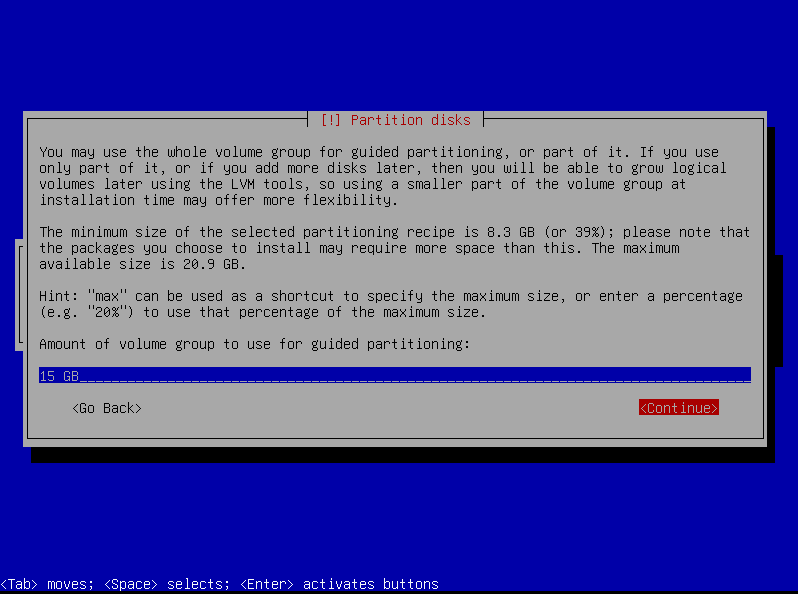
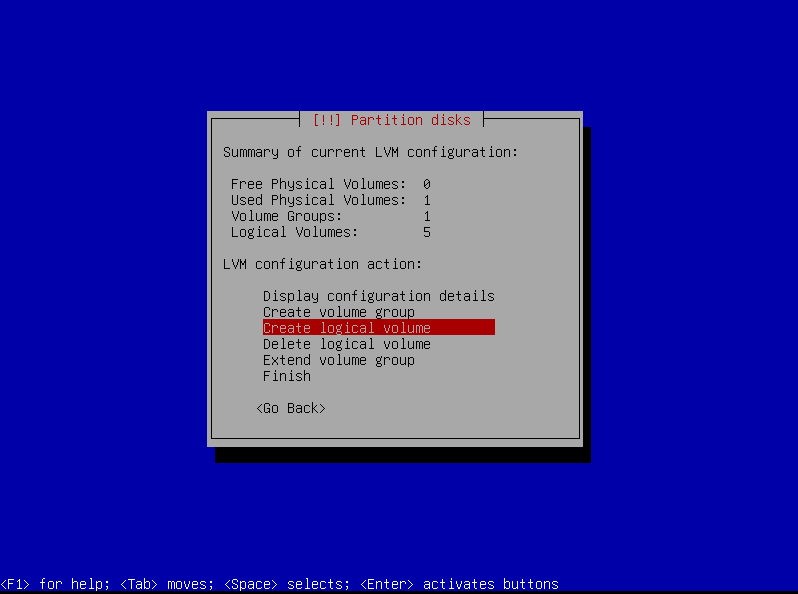
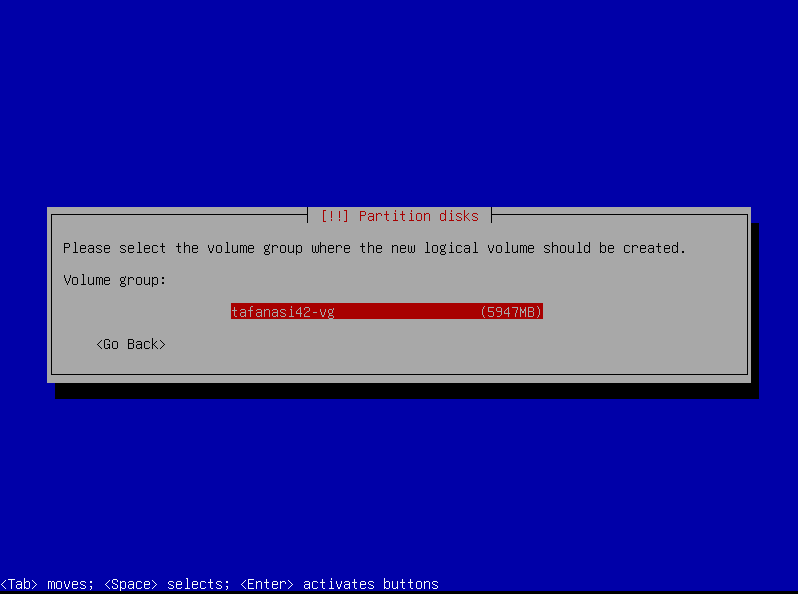
Adjust the volume group size in guided partitioning to carve out space for a couple more logical volumes.
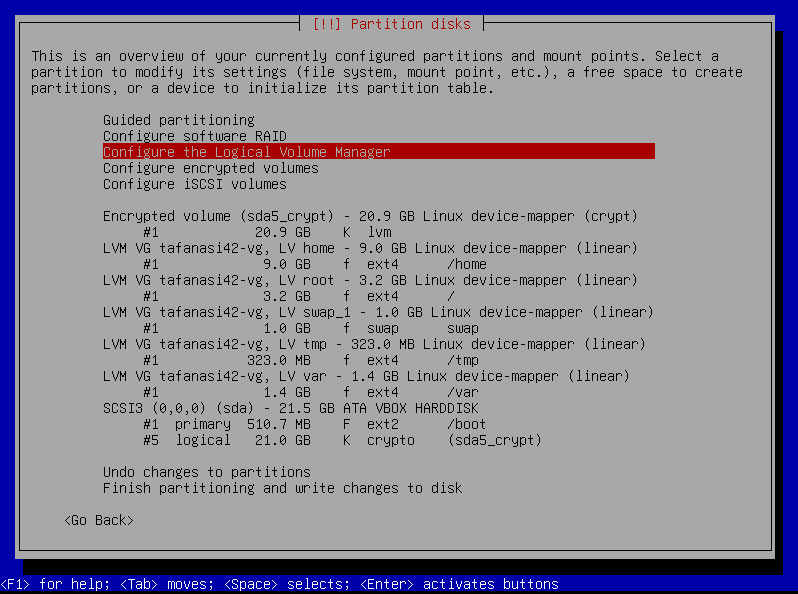
Head over to “Configure the Logical Volume Manager”, and make two logical volumes: srv and var-log. Set them both as “Ext4 journaling file system” and mount them respectively to /srv and /var/log.
Screenshots
srv
Info
What is
/srv? It’s a directory that is used to store data served by the system. For example, if you have a web server, you might store your website files in/srv/www.
Screenshots
Let’s allocate
4000mbfor/srv:

var-log
Info
What is
/var/log? It’s a directory that contains log files generated by the system and applications. Common log files include:
/var/log/syslog: General system logs/var/log/auth.log: Authentication logs/var/log/dpkg.log: Package management logs And many more…
Repeat the same process for /var/log, but name it var-log and allocate 1950mb of space.
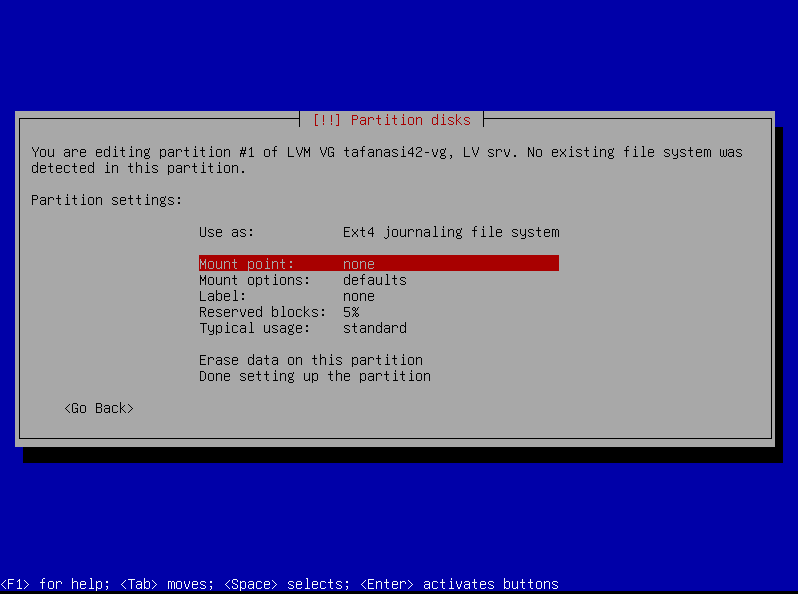
Format and Mount the Partitions
Alright. The volumes are created now:
4000mbfor/srv1950mbfor/var/log
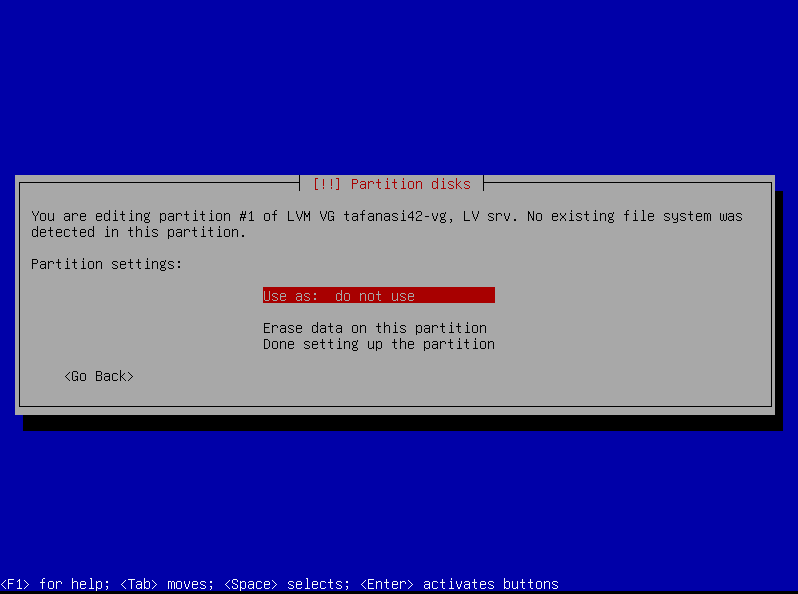
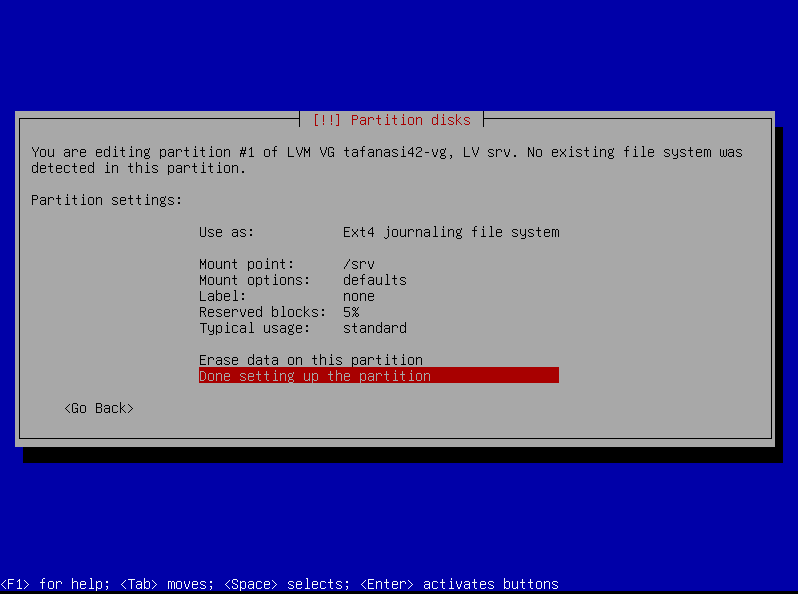
But in order to use them, we need to format (ext4 format) and mount them. In short, the system needs to know where these partitions are and how to access them.
Screenshots
srv: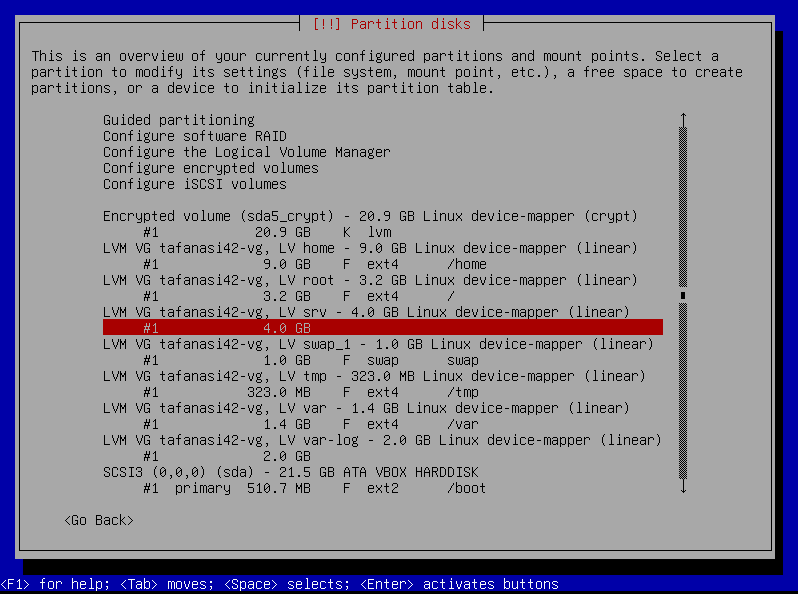

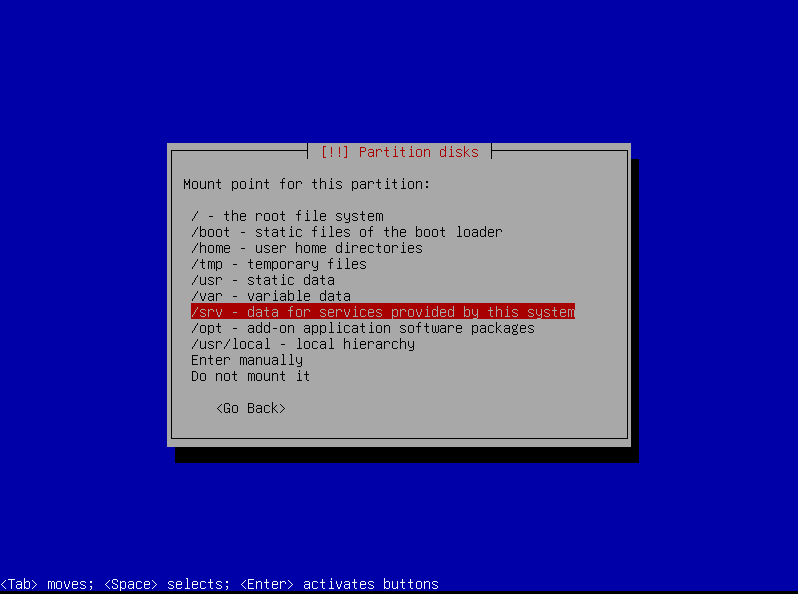
Repeat the same process for /var/log:
- Format it as
ext4 - Mount it to
/var/log(enter manually)
Screenshots
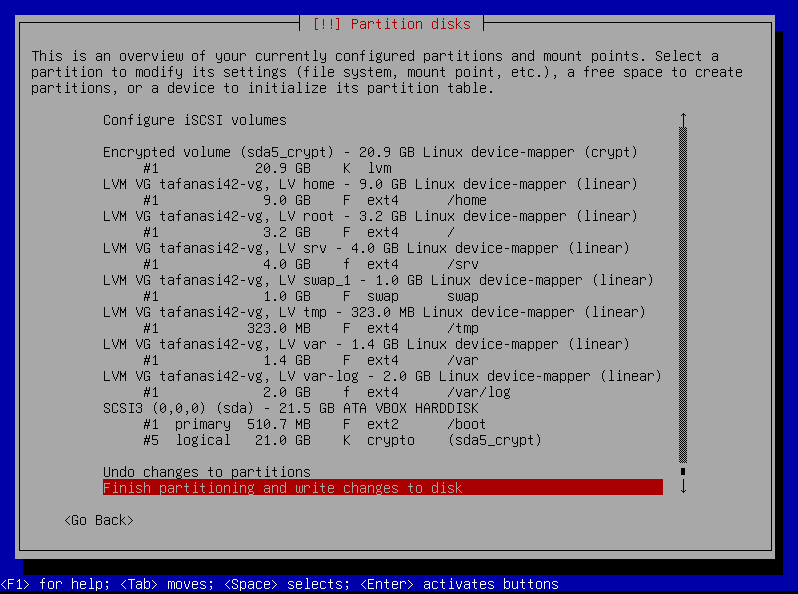
Seems like we’re done with partitioning. Let’s move on to the next step.
Extra Settings
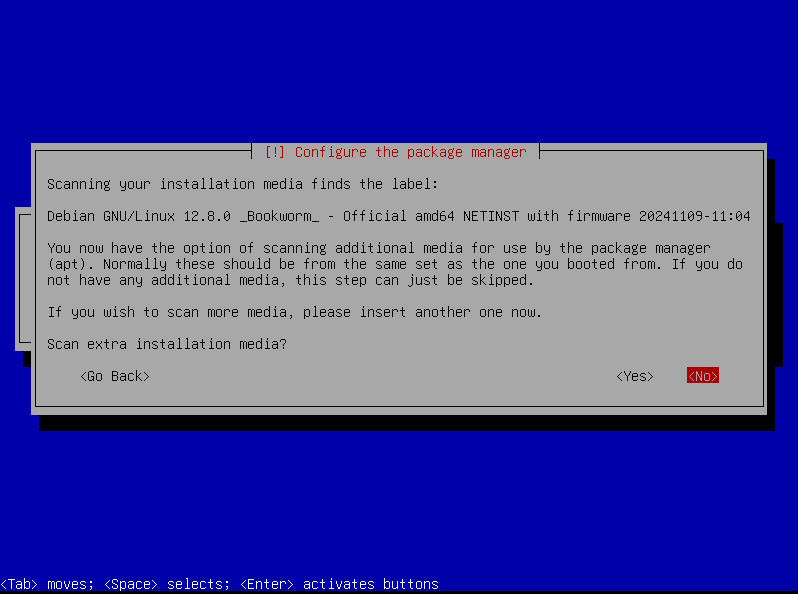
Installation Media Scan
Avoid scanning for extra installation media
Screenshots
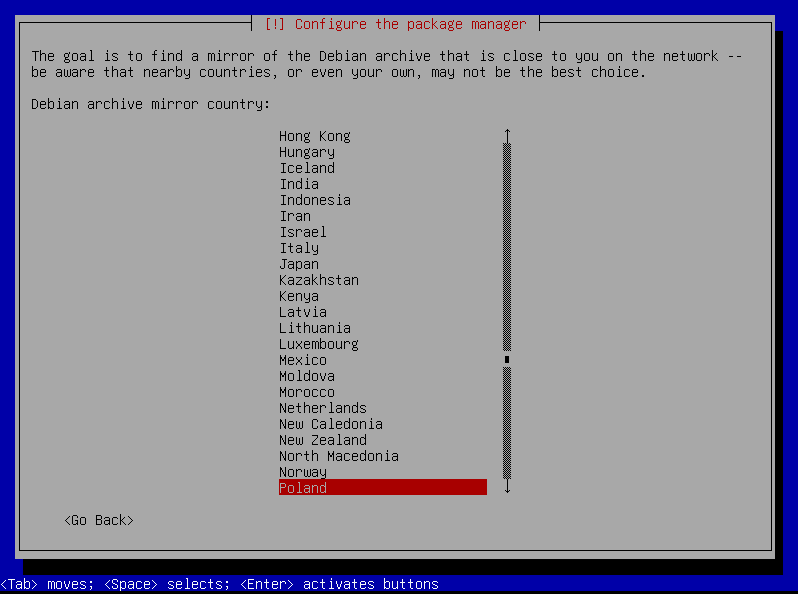
Country
Select your country from the list
Screenshots
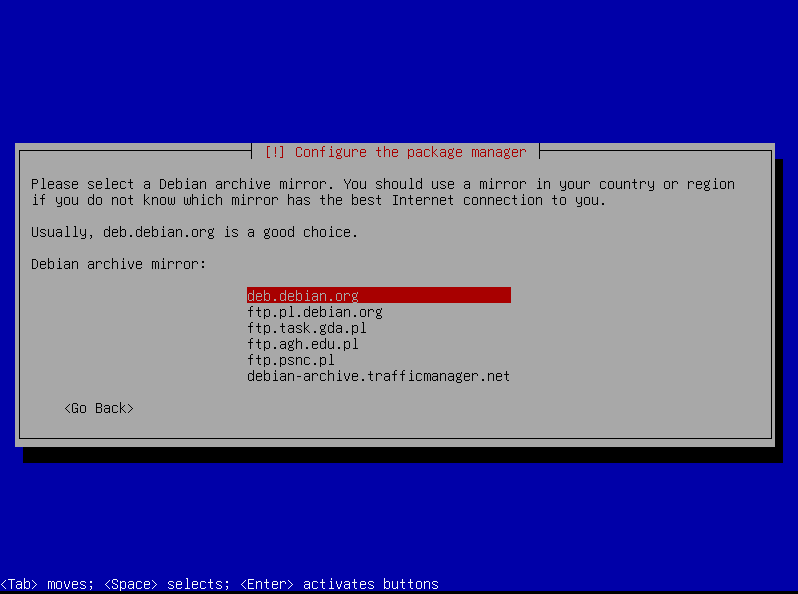
Mirror
Select the default Debian archive mirror
Screenshots
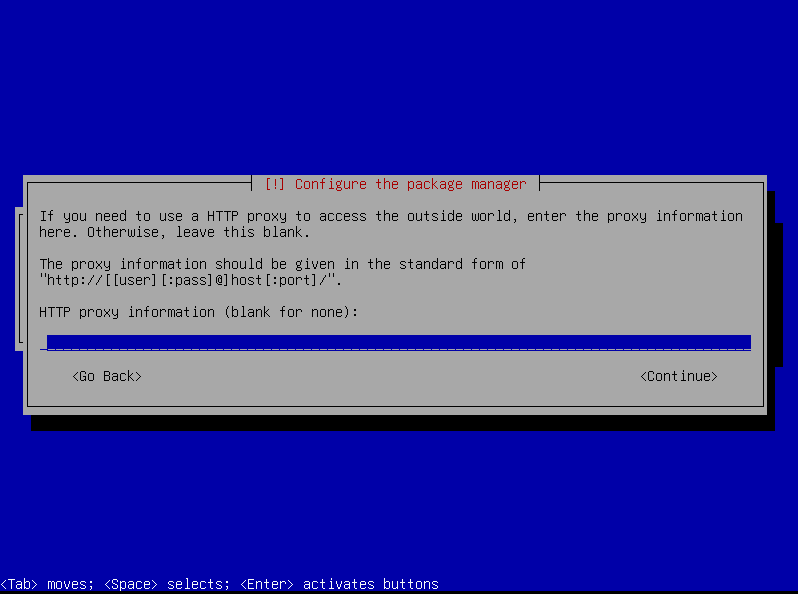
HTTP Proxy
Leave it blank :)
Screenshots
Software Selection
Choose only the SSH server and standard system utilities. Use space to check/uncheck.
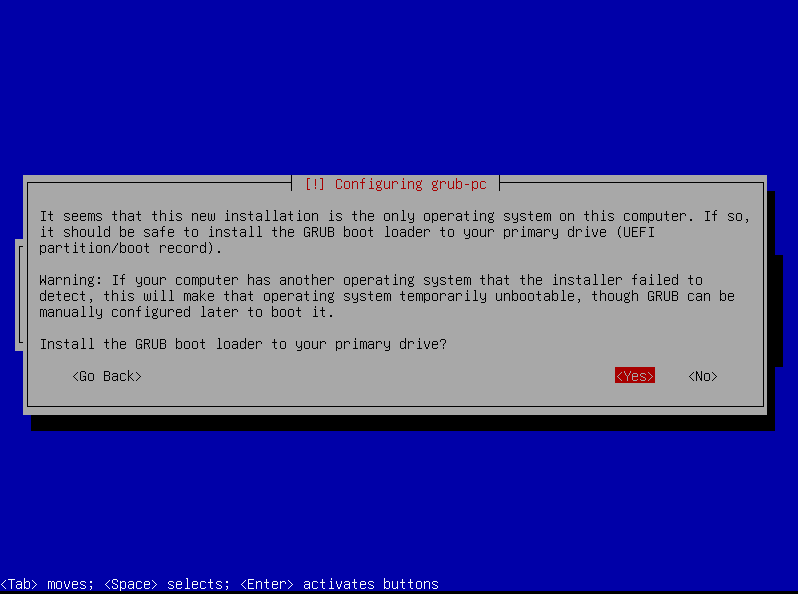
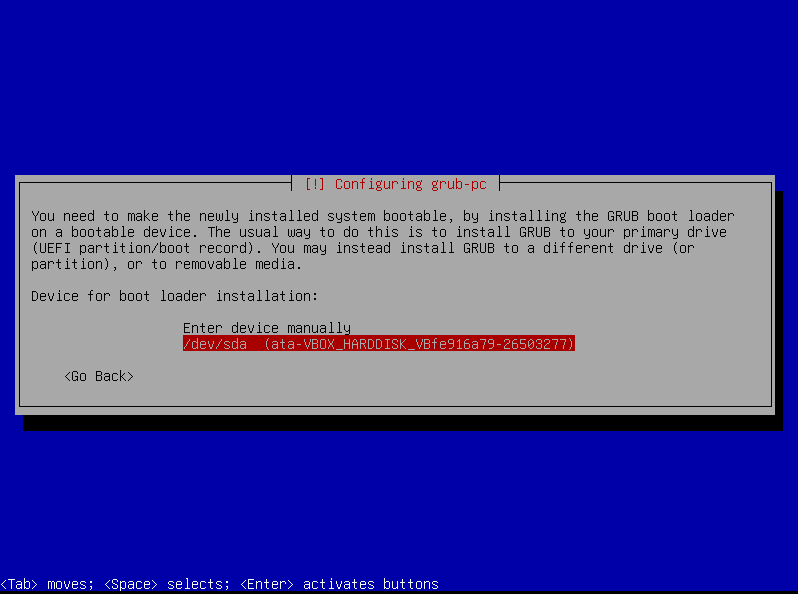
Grub Boot Loader
Install the GRUB boot loader to the master boot record. This is the default option.
Screenshots
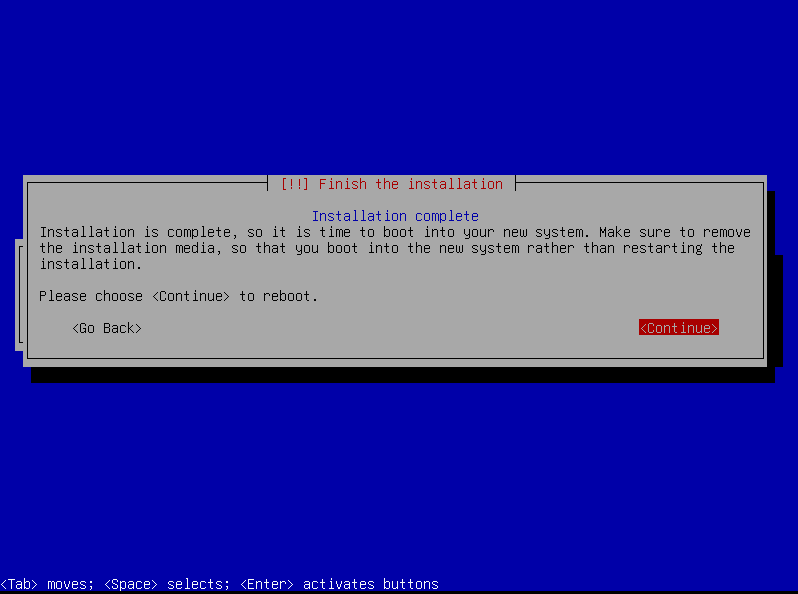
And just like that, we’re done installing. 🎉
Setting up SSH
Info
SSH (Secure Shell) is a protocol that allows you to securely connect to a remote server or device. It’s commonly used for remote administration, file transfers, and tunneling.
Our task is to setup an SSH server on our virtual machine. This will allow us to connect to the VM remotely and perform administrative tasks. SSH Server should be running on port 4242 and it shouldn’t be accessible from the root account.
SSH Config
In order to do this, we need to edit the SSH configuration file located at /etc/ssh/sshd_config:
Info
You can login to your VM using the
userorrootaccount you created during installation. If you login asuser, you can switch to the root account usingsu. When in sudo mode, you can skip thesudocommand.
sudo nano /etc/ssh/sshd_config- Find the line that says
#Port 22and change it toPort 4242. This will change the default SSH port from22to4242. - Find the line that says
#PermitRootLogin ...and change it toPermitRootLogin no. This will prevent the root account from logging in via SSH.
Once done, save the file (CTRL+X, Y) and restart the SSH service:
sudo systemctl restart sshd
sudo systemctl status ssh
Now the port is changed and root login is disabled. Lets test it out by connecting to the VM via SSH.
SSH Connection

Port Forwarding
When using VirtualBox, you need to set up port forwarding to connect to the VM via SSH. Let’s head over to the VM settings and add a new rule:
- Go to VM’s
Settings→Network→Advanced→Port Forwarding - Add a new rule with
Host Portas4242andGuest Portas2222.
Connecting
Now, you can connect to the VM using the following command:
ssh username@localhost -p 2222Replace username with the user you created during installation.
Info
Explanation:
ssh: The command to connect to a remote server.username@localhost: The username and hostname of the server you want to connect to. Since we’re connecting to the VM on the same machine, we uselocalhostinstead of an IP address.-p 2222: Specifies the port to connect to. Since we’ve set up port forwarding, we connect to port2222on the host machine, which forwards to port4242on the Debian Virtual Machine.
Screenshots

Congrats! You’ve successfully set up an SSH server and connected to your Debian Virtual Machine 🚀
Firewall
Once you are logged into SSH, switch to the root user by typing: su -
To enhance the server’s security, we’ll set up a firewall using UFW (Uncomplicated Firewall). UFW is user-friendly and effective for managing firewall rules. Let’s start by installing UFW:
apt install ufw | Installs UFW.
ufw default deny incoming | Blocks all incoming requests.
ufw default allow outgoing | Allows all outgoing requests.
ufw allow 4242 | Allow incoming traffic on port 4242. This is crucial to ensure you can still access your server via SSH.
ufw enable | Enables UFW.
Sudo
The sudo program is a crucial tool for Linux, allowing users to execute commands with privileges of root (or another user).
To install, type: apt install sudo
Now, we’ll adjust the sudo settings. Type visudo to open the configuration file.
Add the following lines:
Defaults secure_path="/usr/local/sbin:/usr/local/bin:/usr/sbin:/usr/bin:/sbin:/bin" | Limits the paths that can be used by sudo to run commands. This setting is already there and you can leave it as it is.
Defaults requiretty | Requires TTY to use sudo.
Defaults badpass_message="WRONG PASSWORD" | Displays a custom message when using a wrong password with sudo.
Defaults logfile="/var/log/sudo/sudo.log" | Sets the input logs file.
Defaults log_input | Logs input.
Defaults log_output | Logs output.
Defaults iolog_dir=/var/log/sudo | Sets the directory to save additional output and input logs.
Defaults passwd_tries=3 | Limits connection attempts using sudo.
Groups
We need to add our user to the user42 and sudo groups as specified in the born2beroot requirements.
groupadd user42 | Adds the user42 group.
usermod -a -G user42,sudo chlimous | Adds the chlimous user to the user42 and sudo groups.
To verify the changes, you can check the /etc/group file: cat /etc/group
Now that your user has been added to the sudo group, he can execute commands using sudo, elevating his permissions to perform administrative tasks.
Password Policy
Go to the /etc/login.defs configuration file and modify the following lines:
PASS_MAX_DAYS 30 | Makes the password expire every 30 days.
PASS_MIN_DAYS 2 | Minimum number of days before the modification of a password.
PASS_WARN_AGE 7 | Number of days warning given before a password expires. You can leave it as it is.
Now we need to ensure the policy changes we’ve made are applied to our current users:
chage -M 30 chlimous | Sets PASS_MAX_DAYS to 30 days for user chlimous.
chage -m 2 chlimous | Sets PASS_MIN_DAYS to 2 days for user chlimous.
Apply these changes for user and root by saving the file.
To strengthten the password policy, we will utilize a module called pwquality:
apt install libpam-pwqualityThen, access /etc/pam.d/common-password configuration file to set the password rules.
Change:
password requisite pam_pwquality.so retry=3
to:
password requisite pam_pwquality.so retry=3 minlen=10 difok=7 maxrepeat=3 dcredit=-1 ucredit=-1 lcredit=-1 reject_username enforce_for_root
Details:
retry | Maximum amount of incorrect attempts.
minlen | Minimum acceptable size for the new password.
difok | Number of characters in the new password that must not be present in the old password. Even with enforce_for_root, this rule doesn’t apply to the root user since the old password is not required to change it.
maxrepeat | The maximum number of allowed same consecutive characters in the new password.
dcredit | Minimum number of digits in the new password. (negative value)
ucredit | Minimum number of uppercase characters in the new password. (negative value)
lcredit | Minimum number of lowercase characters in the new password. (negative value)
reject_username | The new password cannot include the username.
enforce_for_root | Applies rules to root.
Save the file in order to enforce the rules and update the passwords for both your user account and the root account:
passwd devnyxie #Changes the password of the devnyxie user
passwd root
Monitoring Script
The final task is to set up a monitoring script that will log the CPU and memory usage of the system every 10 minutes. The script should run in the background and log the data to a file.
Create a script file named monitoring.sh in the /root directory:
nano monitoring.shWrite your own script or use my script (bad choice, RTFM):
#!bin/bash

# architecture
cmd=$(uname -a)
printf "#Architecture: $cmd\n"

# cpu sockets
cmd=$(lscpu | grep Socket | awk '{print $2}')
printf "#CPU physical: $cmd\n"

# virtual cpu's
cmd=$(nproc)
printf "#vCPU: $cmd\n"

# ram usage
cmd1=$(free -m | grep Mem | awk '{print $3}')
cmd2=$(free -m | grep Mem | awk '{print $2}')
cmd3=$(awk "BEGIN {printf \"%.2f\", $cmd1/$cmd2 * 100}")  # limit to two decimal places
printf "#Memory Usage: $cmd1/$cmd2%s ($cmd3)\n" "Gb"

# cpu load
cmd1=$(mpstat | tail -n 1 | awk '{print $4}')
cmd2=$(mpstat | tail -n 1 | awk '{print $6}')
cmd3=$(echo "scale=2; $cmd1 + $cmd2" | bc)  # set scale for precision
cmd3=$(printf "%.2f" "$cmd3")               # ensure leading zero
printf "#CPU load: $cmd3%%\n"

cmd=$(who -b | awk '{print $3 " " $4}')
printf "#Last boot: $cmd\n"

# lvm use
# maps the lvm devices and count them
cmd=$(cat /etc/fstab | grep /dev/mapper | wc -l)
printf "#LVM use: "
if [ $cmd -gt 0 ]
then
        printf "yes\n"
else
        printf "no\n"
fi

# tcp connections
cmd=$(echo "$(ss -t state established | wc -l) - 1" | bc)
printf "#Connections TCP: $cmd ESTABLISHED\n"

# user log
cmd=$(($(w | wc -l) - 2))
printf "#User log: $cmd\n"

# network info
# ip
cmd1=$(ip address | grep enp | grep inet | awk '{print $2}' | cut -d / -f1)
# mac
cmd2=$(ip address | grep enp -A 1 | grep ether | awk '{print $2}')
printf "#Network: IP $cmd1 ($cmd2)\n"

# count sudo commands in sudo.log
cmd=$(grep -c 'COMMAND=' /var/log/sudo/sudo.log 2>/dev/null || echo 0)
printf "#Sudo: $cmd cmd\n"
No worries if you don’t understand the script. It’s just a bunch of commands to get system information and format it nicely.
For example:
uname -a: Prints general system information, including the kernel version, architecture, and hostname.uname -aoutput example:Linux debian 5.10.0-11-amd64 #1 SMP Debian 5.10.92-1 (2022-01-14) x86_64 GNU/Linuxlscpu: Displays information about the CPU architecture. We use it to get the number of CPU sockets.What is a CPU socket?
A CPU socket is a physical connector on the motherboard that houses the CPU. It’s where you install the processor.
nproc: Prints the number of processing units available to the current process. We use it to get the number of virtual CPUs.What is a processing unit?
A processing unit is a logical unit that can execute instructions. It can be a physical core, a thread, or a virtual core.
free -m: Displays the amount of free and used memory (RAM) in the system. We use it to get the memory usage.df -h: Shows the disk space usage of the file system. We use it to get the disk usage.mpstat: Displays the CPU statistics. We use it to get the CPU load.who -b: Shows the last system boot time.cat /etc/fstab: Prints the file system table. We use it to check if LVM (Logical Volume Manager) is used.ss -t state established: Shows the number of TCP connections in the established state.w: Displays information about the users currently logged in. We use it to get the number of users.ip address: Shows the network interfaces and their IP addresses. We use it to get the network information.grep -c 'COMMAND=' /var/log/sudo/sudo.log: Counts the number of sudo commands in the sudo log file.
Cron Job
To run the script every 10 minutes, we’ll set up a cron job. Cron is a time-based job scheduler in Unix-like operating systems. It allows you to schedule tasks to run at specific intervals.
Edit the crontab file using the command crontab -e and add the following line at the end:
*/10 * * * * /root/monitoring.shThis line tells the system to run the monitoring.sh script every 10 minutes. Save the file and exit.
And that’s it! You’ve successfully set up a monitoring script that logs all the necessary system information every 10 minutes 🎉

Bonus Part ⭐

The bonus part of the Born2beRoot project involves setting up additional features on your server.
- Advanced Partitioning: We’ve already set up advanced partitioning in the mandatory part. ✅
- WordPress Website: You can set up a WordPress website on your server. This involves installing and configuring a web server (Lighttpd), a database server (MySQL or MariaDB), and WordPress itself.
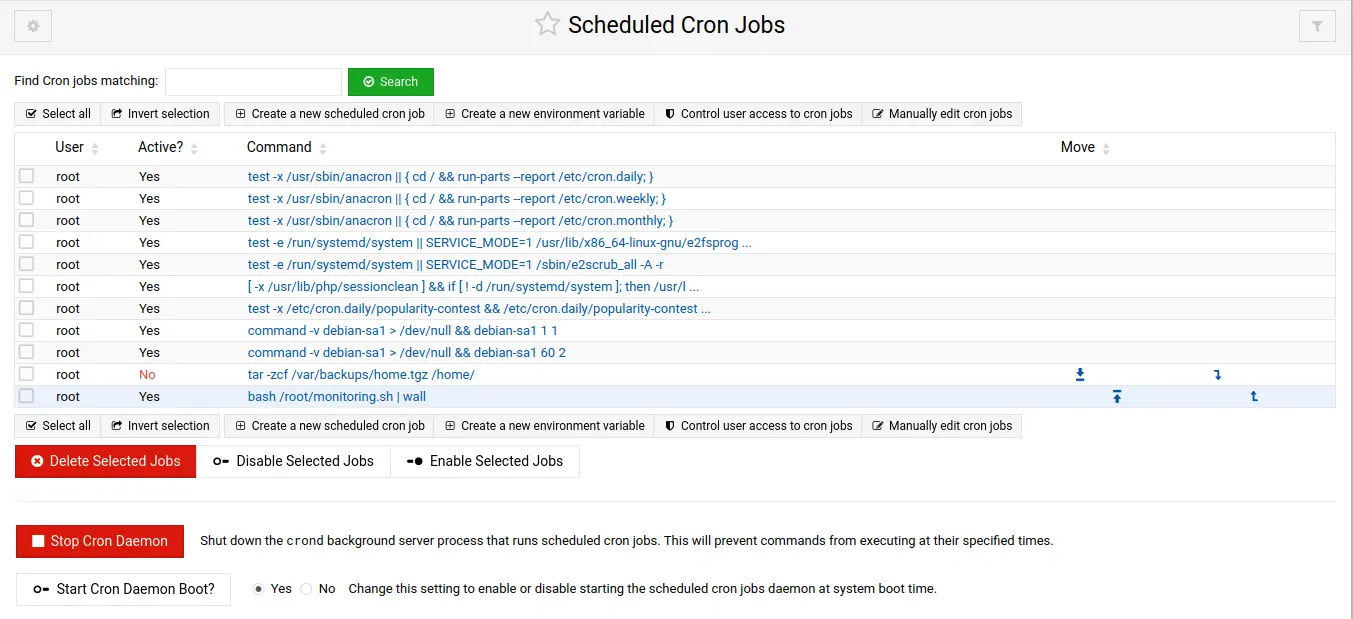
- Additional Service: You can set up any additional service of your choice. For example, you could install and configure an FTP server, a mail server, or a monitoring tool like Nagios. I chose to set up a Webmin, a web-based system administration tool. With Webmin, you can manage your server, databases, cron jobs, security, configure system settings, and monitor performance through a web interface.
Webmin Screenshots

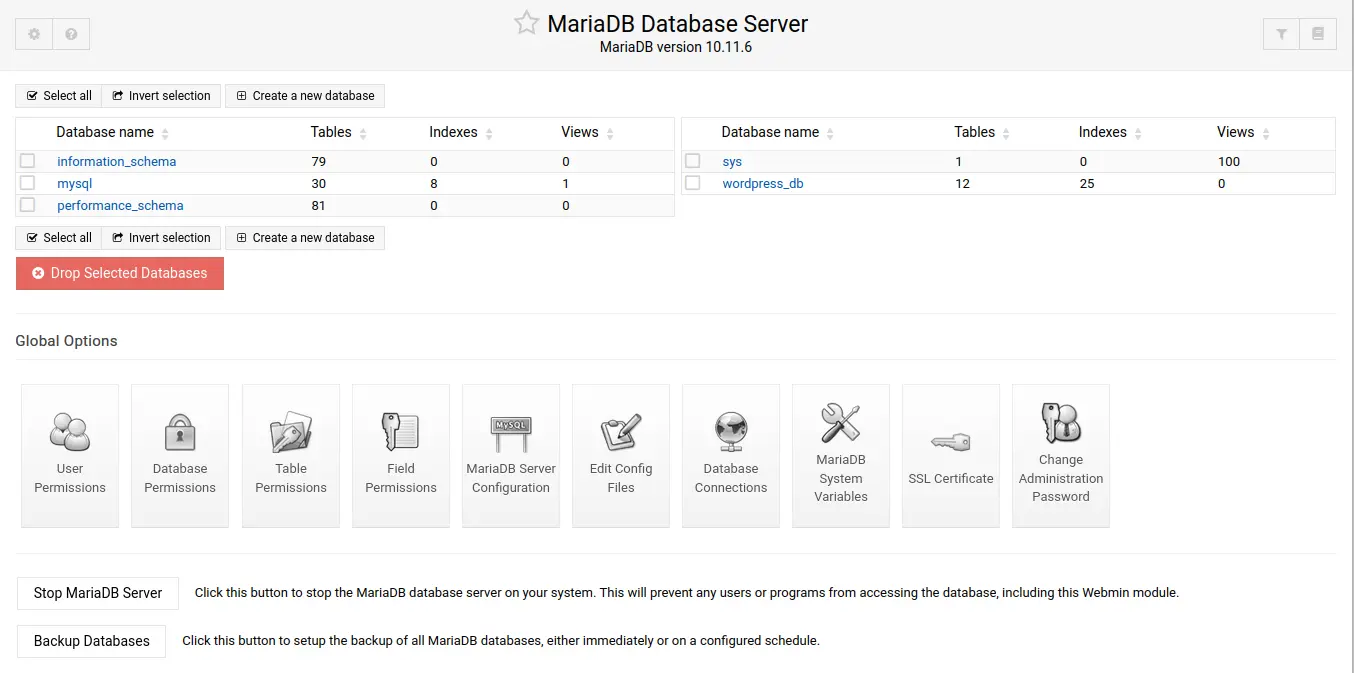
WordPress and Lighttpd
This part is not complex, but it requires a lot of steps. You need to install and configure a web server (Lighttpd), a database server (MySQL or MariaDB), and WordPress itself. There are many guides, but I really recommend to dive into it and understand what you’re doing. Good luck! 🍀
Webmin
Installation
Please check the official Webmin installation guide for the most up-to-date instructions.
I’ve installed Webmin on my server using the following commands:
Add the Webmin repository to your sources list:
curl -o webmin-setup-repos.sh https://raw.githubusercontent.com/webmin/webmin/master/webmin-setup-repos.sh
sh webmin-setup-repos.sh
Install Webmin:
apt-get install webmin --install-recommendsCheck if the Webmin
Configuration
Once Webmin is installed, you can access it through your web browser by entering https://localhost:10000. You may get a warning about the SSL certificate, but you can proceed to the site.
In order to get rid of the warning, we can safely switch to HTTP instead of HTTPS protocol, since we’re accessing the server locally.
Edit the Webmin configuration file:
nano /etc/webmin/miniserv.confFind the line that says ssl=1 and change it to ssl=0. Save the file and restart the Webmin service:
systemctl restart webminPort Forwarding
In order to access the Webmin interface from your host machine, you need to open port 10000 both for Firewall and VirtualBox.
Firewall rule:
ufw allow 10000Add a new port forwarding rule in VirtualBox:
| Name | Protocol | Host IP | Host Port | Guest IP | Guest Port |
|---|---|---|---|---|---|
| Webmin | TCP | 10000 | 10000 |
Accessing Webmin
Now you can access the Webmin interface from your host machine by entering http://localhost:10000 in your web browser. You’ll be prompted to enter your root credentials to log in.
And that’s it! You’ve successfully set up Webmin on your server 🚀